
Yukon blog
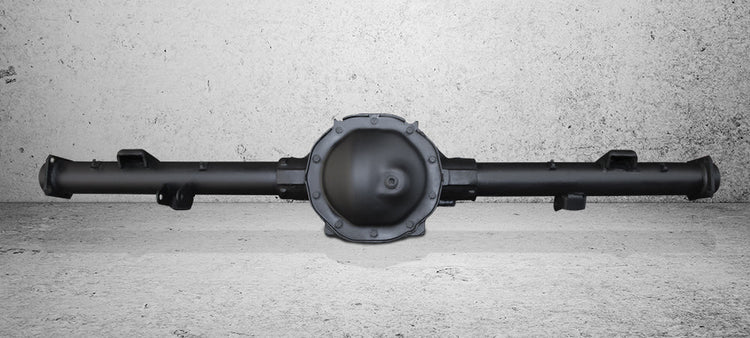
Understanding Differential Noise: Part 1
Many things can go wrong inside a differential. Although the hints are often subtle, most impending failures give fair warning in the form of noise. Recognizing Gear Noise Several situations can create ring-and-pinion noise. If the gears have been quiet and begin to howl, they’re likely worn or wearing. If the gears howl during deceleration only, the pinion-bearing preload may have loosened. Howling under acceleration at all speeds indicates that something inside the differential—gears, pinion, or carrier bearings—has worn or no longer keeps proper gear alignment. If the gears howl only while accelerating through a certain speed range, it’s often a sign of wear caused by lubrication failure or overloading. When a newly installed gear set howls, suspect an issue with the gear design or setup. Identifying Bearing Noise A common problem is worn carrier bearings, usually indicated by a low-pitch rumble above 20 mph. On vehicles with C-clip axles, the noise may change while cornering. Worn pinion bearings can cause whirring noises at all speeds, under both deceleration and acceleration. Because the pinion rotates faster than the carrier, pinion-bearing issues tend to produce a whir rather than a rumble. Severely worn bearings can also cause a howl if they fail to support the gears correctly. Wheel Bearing Troubles Worn wheel bearings can be tricky to diagnose. A completely failed bearing will announce itself loudly, but one that’s only starting to fail can be deceptive. Turning sharply from side to side can help isolate the problem, but don’t be fooled—a bad right-front bearing can sometimes make noise while turning right, even though the load is shifting differently than expected. When the Gears Go Silent (But the Vehicle Doesn’t Move) Sometimes a failure won’t make much noise—until it’s too late. If the pinion spins but the tires don’t rotate, you could be dealing with broken spider gears. This type of failure often ends with a loud crunch as the gears give way. A broken ring gear can allow the vehicle to move a few feet before grinding or banging as the damaged teeth meet the pinion. Depending on the ratio, a broken pinion tooth will clunk roughly every two or three feet of travel. Broken Axles and Gear Imperfections A broken axle is easy to spot. On a C-clip-style axle, the shaft can slide out of the housing—or even fall out—without unbolting anything. On bolt-in-style axles, you’ll usually notice the wheel cambering inward as the shaft fails. A high spot on a gear tooth can sound similar to a broken gear but only makes noise while accelerating or decelerating. A high spot on the ring gear produces a heavy click about every eight feet, while a high spot on the pinion is much more frequent and noticeable due to its faster rotation. Listen and Inspect Early Whether it’s a howl, whir, rumble, or clunk, differential noise is a warning. Listen closely—catching a small problem early can save your gears, bearings, and wallet from major damage. When in doubt, remove the cover or third member for inspection. Spotting a failing part before it destroys others is always worth the effort. Popular Resources: New Gear Break-In Properly Setting Preload with Side Adjusters Size Matters
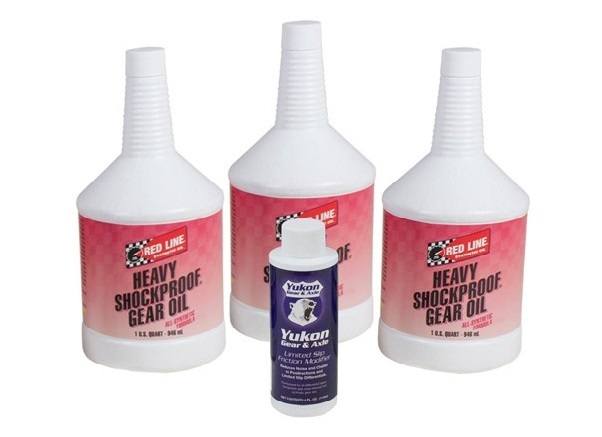
Gear Oil & Friction Modifiers: What They Do and Why They Matter
Gear oil keeps key drivetrain components—like the ring and pinion gear set, spider and side gears, limited slip differentials, axles, and bearings—lubricated and running smoothly. Friction modifiers are additives that enhance the performance and efficiency of clutch-style limited slip differentials. Understanding how these vital fluids and additives work is essential for maintaining your driveline’s performance, longevity, and reliability under the harshest conditions. Read this article in Español Differential Oil by the Numbers Yukon recommends non-synthetic 80W-90 GL-5 gear oil in all differentials. Oil is rated by its viscosity value, which represents how thick or thin the fluid is at certain temperatures. Take a multi-grade oil like 80W-90: 80W – the viscosity at 0°F (the “W” stands for winter). An 80W oil is thicker than a 60W oil at that low temperature. 90 – the viscosity at 212°F, the oil’s behavior at operating temperature. A higher number means a thicker oil under heat. Multi-grade oils are blended with polymers that reduce the rate of thinning as temperatures rise and slow thickening as temperatures drop. The result is a product that performs well across a wide temperature range. Generally, a thinner oil circulates faster through the differential during cold starts, while a thicker oil offers better protection when gears generate higher temperatures under heavy load. Understanding the GL-5 Rating The GL-5 designation identifies how much sulfur-based friction modifier is present in the oil. This chemical additive helps the oil maintain film strength and protection under extreme pressure—perfect for hypoid gears in differentials and limited slips. Important note: Because GL-5 oils contain high sulfur levels, they are not suitable for manual transmissions. The sulfur can corrode soft metal parts like brass synchros. For transmissions, a milder GL-4 formulation is required. Yukon offers a full range of gear oils in various viscosities and both synthetic and non-synthetic blends to meet every performance and climate need. Stand-Alone Friction Modifiers Yukon Friction Modifier Additives are used when additional clamping force is needed in clutch-style limited slip differentials, such as the Yukon Dura Grip. These additives are not intended for gear-driven LSDs like the Spartan Helical LSD. Friction modifiers help eliminate annoying clutch chatter by ensuring smooth engagement and disengagement of the clutch packs. Yukon’s proprietary formula is designed specifically for the composite clutch discs used in Yukon LSDs. It delivers the optimal friction characteristics for consistent performance and longevity. Our friction modifier can also help compensate for slightly worn clutches or fine-tune the behavior of a differential for specialized uses—like road racing or vehicles that see frequent track days. Note: Avoid using parts-store-grade modifiers in your Dura Grip. Those products are formulated for OEM paper-style clutches and lack the proper abrasiveness for Yukon’s composite design. They perform more like diluted versions of our advanced formula. Maintenance Matters Both gear oil and friction modifiers play a critical role in differential health. Knowing how these products are rated and how they perform helps you make informed maintenance decisions that keep your Yukon-equipped driveline performing its best for years to come. Shop Oil & Additives Watch: Understanding Gear Oil and Friction Modifiers

How to Use an RPM Calculator to Find the Right Gear Ratio
An RPM Calculator is an essential tool for anyone considering upgrading to larger tires, changing their ring and pinion gears, or simply curious about their vehicle’s current performance setup. The calculator determines your engine RPM at a specific vehicle speed, helping you understand how gearing and tire size affect performance. What You Need to Know The RPM Calculator requires two key pieces of information: your vehicle’s gear ratio and tire height. Your stock gear ratio can often be found in your vehicle’s owner’s manual, researched online, or identified on a tag affixed to your differential cover. If you have your ring and pinion gears on hand, you can count the teeth on each and use the Yukon Gear Ratio Calculator to determine your ratio. Tire height can be found using our Tire Size Calculator, which uses tire width, aspect ratio, and wheel diameter to calculate true tire height in inches. Keep in mind that tire sizes are classifications, not precise measurements. For example, a 35x12.50-17 Mickey Thompson Baja Boss M/T measures 34.6 inches in circumference on a 9.5-inch-wide rim and 34.8 inches on a 10-inch rim. Some tires vary by nearly half an inch, so it’s smart to check the manufacturer’s specifications for the most accurate data. Feeding the Numbers Once you have your gear ratio and tire height, it’s time to plug them into the calculator. Select the vehicle speed you want to evaluate and hit Solve. The calculator will display the resulting engine RPM for that speed in four boxes below the calculator interface. Each box represents a different transmission type and factors in how internal gear reduction affects engine speed. The categories are labeled Auto, AOD, Manual, and 5-Speed. Simply refer to the one that matches your transmission for accurate results. Using the Calculator for Big-Tire Upgrades Before jumping to bigger tires, start by entering your stock setup as a baseline. Then, test various speeds—especially freeway speeds—to see how RPM changes with tire size. Decide your goal: Do you want to replicate stock performance, improve low-speed torque for off-roading, or optimize for towing and highway cruising? Have the tire heights for all your potential upgrades on hand. Enter each tire size into the calculator and adjust the gear ratio field until you find the setup that best meets your performance expectations. Make note of that ratio—this is your ideal target when shopping for ring and pinion gear sets. Yukon Re-Gear Kits Upgrading to big tires isn’t as simple as bolting them on and hitting the trail. Larger tires affect acceleration, towing capacity, fuel economy, and even drivetrain stress. Yukon Re-Gear Kits let you restore or enhance performance, ensuring your rig runs efficiently and confidently—whether it’s a daily driver, weekend crawler, or overland build. Shop Yukon Re-Gear Kits
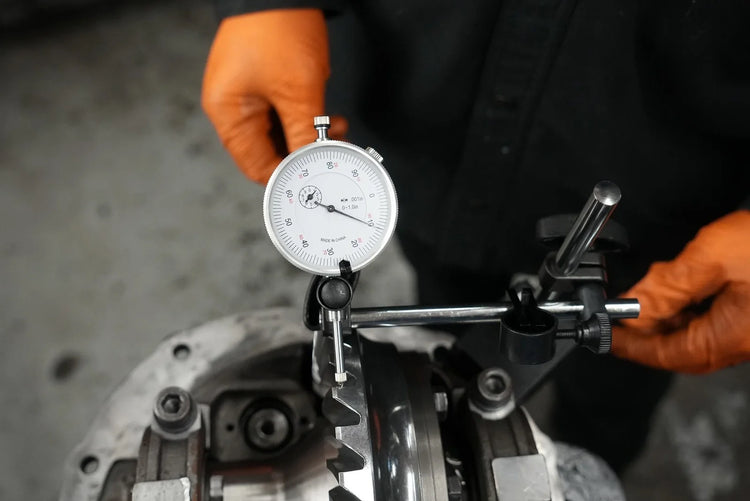
How To Use A Dial Indicator
The keys to properly using a dial indicator are precision and patience. The payoff is a long-lasting driveline. The dial indicator is one of those specialized tools that has an intimidating reputation, but as with many things, understanding the components of the tool and how they work is half the game. A dial indicator typically measures the backlash of a ring and pinion gear. It can also be used to measure runout, the untrue movement (wobble) of a rotating object like an axle, cam or crankshaft journal, wheel, brake rotor, or the input shaft of a manual transaxle/transmission. Precision is important because in ring and pinion jobs we are dealing with shims that can be paper sheet thin… as thin as three thousandths of an inch. The first step to dial indicator enlightenment is understanding the workings of the tool. Anatomy Of A Dial Indicator When measuring backlash in a ring gear the placement of the dial indicator is key. High-pinion and low-pinion applications have the drive side gear teeth on different sides of the ring gear. This will determine where the dial indicator is set up because measurements are made on the drive side of the tooth. The Setup A dial indicator is like a high-tech erector set. It can be extended and articulated in an array of angles. Setting up the unit starts with the magnetic base which is placed on the housing and then all the armature is configured to position the tip at a 90-degree angle on the drive gear tooth with the plunger in proper alignment with the gear’s rotation angle. A vast majority of dial indicators have magnets that you position to align the plunger and ring gear tooth. In whatever manner the base of your dial indicator secures to the housing, it must maintain a stable platform because every proceeding step relies on the accuracy and consistency of this starting point. Here, the diff housing makes a great anchor point but other applications may not offer so obvious mounting possibilities. The arm can be moved up or down the main shaft while also being adjusted inward and outward within the housing to more precisely line up the tip and the tooth face. This is where your erector set experience comes into play. There is an adjustment knob behind the dial that allows the dial assembly and plunger to swivel to better match the actuation of the tip with the angle of the gear tooth when the ring gear is moved. The goal is to make as much of a straight line measurement as you can. Tighten everything down to limit flex and be sure the tip is resting on the tooth face… any play or preload in this area will produce false readings. Also, be sure the plunger is not rubbing against the adjacent tooth which may also result in a faulty measurement. Shop Yukon dial indicators and measuring tools here. Measuring You can measure with the existing readout or zero-out the tool by loosening the bezel clamp and rotating the bezel. When measuring backlash on a ring gear be sure you’re only turning the gear and not the pinion which may influence the readout. Clamping or otherwise isolating the pinion is a good idea. When measuring a ring gear, the gear is rotated in both directions to produce freeplay. The amount of the movement is measured as straight-line travel by the tip and plunger. Even the runout of a ring gear can be evaluated by measuring the amount of movement the gear produces back and forth between the thrust bushings. Reading The Dial Most dial indicators have a one-inch stroke, meaning the plunger will only move one inch within the tool. The dial indicator’s range is denoted in the dial. The dial also has units of measure or accuracy indicated, typically in drivetrain operations a 1/1000 of an inch is the preferred unit. The main or outer dial is joined by the smaller revolution counter dial which indicates how many times the needle has gone around the outer dial. So, if the main needle travels around the outer dial twice the revolution dial will read 2. Or 0.200 inches. If the larger needle progresses past zero to 30 on the big dial, the total reading is 0.230 or 230 thousandths of an inch. Total Movement The amount of positive movement and negative movement indicated reveals the total movement. So, the measurement is made from the static beginning with the plunger engaged then it moves inward and outward and the number of units measured in each direction are added together. For instance, if the needle moves from plus five thousandths of an inch to minus 90 thousandths of an inch, the total needle movement is 15 thousandths of an inch. Additionally, if the needle moves 10 thousandths of an inch to the negative side and then five thousandths of an inch to the positive side the total movement is again 15 thousandths of an inch. Once you successfully set up the dial indicator measuring other gear sets will be super easy as long as they have the same pinion arrangement i.e. high pinion or low pinion, as the basic setup of the tool’s armature has been established and you’ll only need to fine tune the tip-to-tooth relationship. Dial indicators deserve a place of honor in your tool case. They expand our capacity, allowing us to do more jobs. They add quality to our work, by enhancing the accuracy of our actions. The end result is a job better done that will last for years to come, a win-win in anyone’s book. Shop Yukon Differential Tools